Here's how I cut and applied vinyl using my SVG charger files:
First I arranged each word of the design on the mat to conserve as much vinyl as possible. I don't recommend breaking elements down any further...you want to keep the curve and spacing of each letter. I cut the vinyl using a higher than normal blade and pressure. Then I weeded and cut out each word, leaving the vinyl attached to the backing paper.
Next I arranged the words on the charger, placing them where they would eventually be attached.
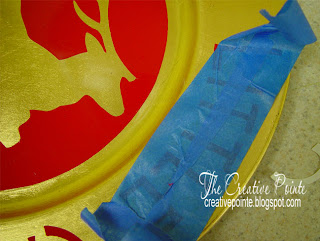
For the words on this charger I used painters tape as my transfer tape. I made sure to "unstick" it by pressing it on my clothes a few times. Place the tape over the top of your letters and lightly press down. For the larger design, a larger square of "unstuck" clear contact paper works great.
Then I turned the taped letters over and peeled off the backing paper.
I pressed the taped letters on the plate in position and carefully pulled off the painters tape.
Finally I carefully burnished the letters to make sure that they were stuck fast.
As I attached each word, I double checked to make sure that the spacing was similar. I'm not so precise that I used a ruler, just eyeballed it.


No comments:
Post a Comment